Making Decals
A Guide On
What You Should Consider
and
What You Should Know
Before Making A Decal
NOTES:- This guide does not deal with packaging. To learn how to package a decal use Wedge's Tutorial here.
- Also, if you could link to this guide in decal topics that could use it, do so. Maybe it will help people provide the community with better decals. Another reason to link to this is because people may not think to look here for a guide, especially those who are new.
Introduction Making quality decals can be time consuming, especially when you're new to it. This is like all art; and like all art it takes time and creativity to make something great. There are several things to consider all throughout the creation process. There is also many things you should not do, in an attempt to increase your decals chance of success.
What You Should Consider- Do I have enough experience to release a quality decal?
- Do I have available resources to create the decal in a professional manner?
- Am I willing to put a few hours into the decal before releasing it?
- Will I have a few people critique it before releasing? If so, will these people be reliable and knowledgeable?
- Will I take the criticism and apply it to my decals design before releasing?
*If you can think of more, I will add them
What You Should Avoid... SeriouslyCopy/Paste: This is one of the biggest no-no's when making decals. Creating a decal does NOT mean slapping an image into a file and putting it into Blockland. We want something that matches the game and that looks good. Real life images do not look good in Blockland. Images from other games do not look good in Blockland. The majority of other digital art does not look good in Blockland.
Basically, don't use images from the web as decals.
Hand Drawing: In rare cases, this is okay. There are many good artists on these forums that could, most likely, make great hand drawn decals. However, if you cannot draw well by hand or do not have a drawing tablet, don't make hand drawn decals. I should note that some people can draw by hand well, and do so without a tablet.
Basing Decals Off References: It's fine to base them off of references, but people make them look too much like the reference. Such that it is almost a clone of the original, only a little less detailed. I have made decals like this before, I admit. One decal was my Jigsaw face. It looked decent, but didn't really fit in with the game. Here is the link if you wish to view it:
Jigsaw Face.
You still can base a decal off a reference, as long as you use it as a reference only. Don't just copy it, reinvent it based off of the reference. Make it fit the Blockland style.
Vectors So, if you shouldn't use hand drawn decals, then what should you use? Vectors. Vectors, in terms of images, are a series of points connected by lines. These points define the shape, and the list of shapes possible to create is infinite.
A few programs that offer vector images are as follows:
- Adobe Photoshop - I don't know the earliest version that supports this. Also, not the best for vectors, but it is viable
- Adobe Illustrator - This is a dedicated vector program and is one of the best I know
- Corel Draw - This is also a dedicated vector program, but in the versions I've used it is glitchy
- Inkscape - Another dedicated (I think) vector program. I believe Wedge has used this, so it's probably a worthwhile program to learn.
- Flash - Although not the best choice, if it's the only one it is somewhat viable. I'd imagine if Flash can use vectors Fireworks can too, maybe someone can confirm this. If so, I'd take Fireworks over Flash.
*Any others to add would be appreciated! I have never used Paint.Net, and from the quick search I did of it, it seems it can't save as a vector image, but it may still be able to create images using vectors. The creation using them is what is needed, since decals are saved as pngs.
Why? You are probably wondering why you would use vectors. Well, vectors are easy to manage, for one. A shape can be easily modified by manipulating the points. Curves can also be easily added, manipulated and removed.
Another bonus is scaling. With a regular bitmap like image, scaling it will cause the image to blur. This is because the software has to guess at what the surrounding pixels will be if it's bigger. With a vector, the points just move. The lines get longer, the curves get bigger, and overall the scaling is perfect. This is beneficial during the creation process. It makes it much easier to manage.
The biggest bonus is the simplicity of it. Although I still hand draw images and scan them in to use as a template, I use vectors to create the digital copy. This is because I can easily match up points to the image, create a vector of pieces of it, and then tweak it to look smooth.
Using Vectors I will use Photoshop CS2 as an example, since this is the program I use. With Photoshop you have a general set of vector tools.
For those that use Photoshop and don't know, or plan on getting it, if you click and hold the tool in the palette, a little box will show up allowing you to select the tool you wish within a set.
- The first is a set of two general manipulation tools. The black pointer selects the entire vector for moving and the white pointer selects individual points.
- The tool to the right is the text tool. Text in Photoshop is vector based, which is perfect when you need text in decals.
- The bottom left is the advanced manipulation tools. The current one selected is the pen tool. This allows you to place points onto the screen, each new point connects to the last and clicking the point you started with closes the image. The other manipulation tool abilities consist of adding/removing points to already made vectors, drawing shapes as if you were using a regular pencil/paintbrush tool, but in this case it smooths the edges out to make them straight, and finally converting points into curves.
- The last slot is for predefined shapes. It has circles, rectangles, rectangles with rounded edges, polygons, and custom shapes in the list. The first three are self explanatory. Polygons allow the user to choose how many points the shape will have, and creates the image. This is for creating triangles, hexagons, etc, simply. The custom shape tool is just libraries of shapes that are pre-made. Shapes in these libraries could be arrows, vehicles, etc.
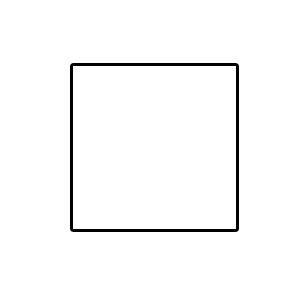
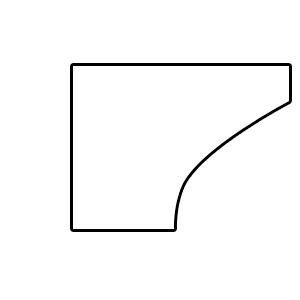
Now that we have the basic tool sets down, which should be similar in other programs, we can start on creation. Any vector image has the potential to be manipulated into something different. As an example, I will take this square and make it into the outline of an anvil (To make it clear, I added a stroke around the edge):
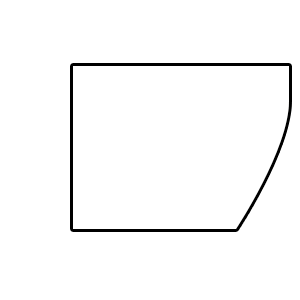
First, I'll add a point to the right edge and move the top right point farther right, along with this new point:
Notice how the new point has a curve. Photoshop makes all new points added to an existing vector have curves, don't ask why because I don't know. This may be similar to other programs, and if it is, someone can inform me. Anyways, to remove this, select the conversion tool under the advanced manipulation set. Then just click the point once. This should remove the curve. Also, I will add another point to the bottom right, but this time leave the curve, and move both points over.
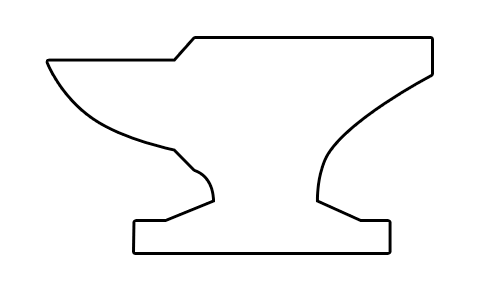
So there is the back end. Vectors are simple to use, and with enough creativity you can make anything you want. For the sake of shortening this guide, I'll skip to the end of the anvil outline.
Using vectors can provide a simplistic way for you to make a decent quality decal. You still need to take your time, though.
Effects Effects can be done in many ways, depending on the look your going for. Take my
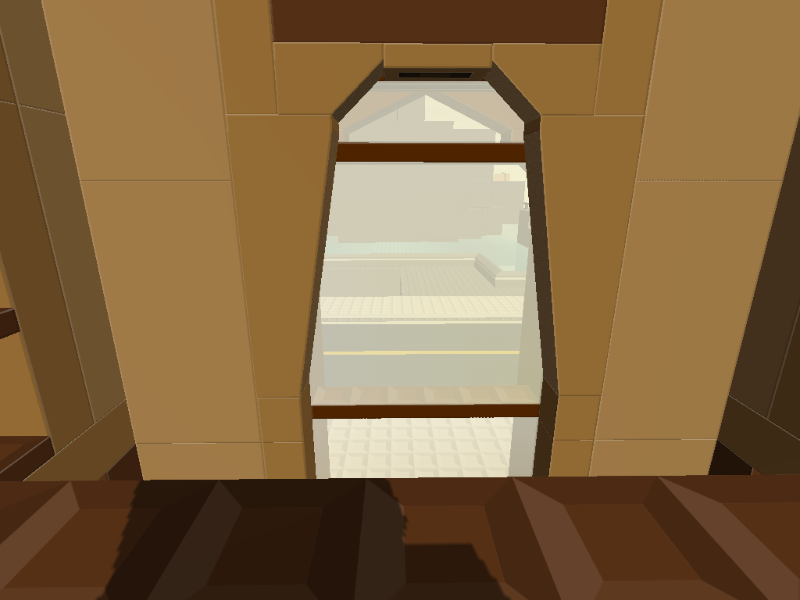
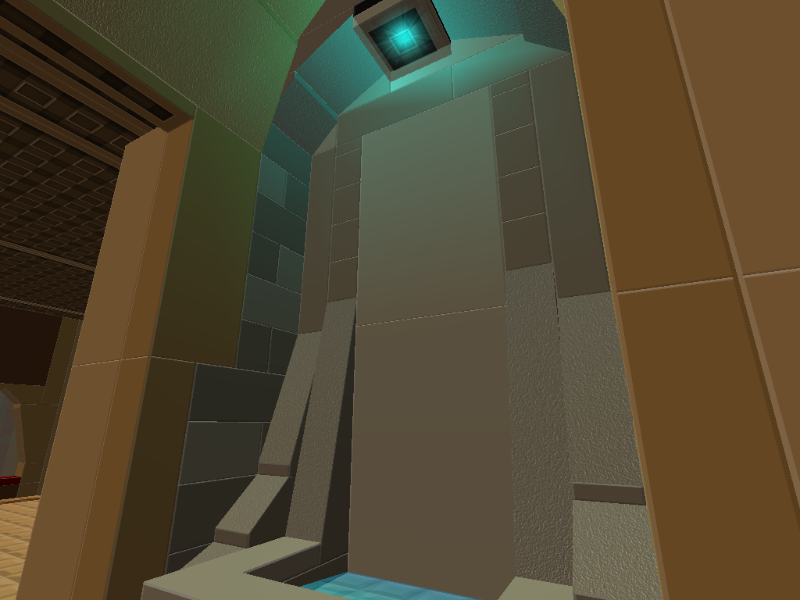
Portal decal for example. In this decal I used vectors on top of other vectors to create a lighting effect. However, in my
dash board decal set radio, I used layer effects to create lighting, textures, etc, on top of vectored images. Between the two, the Portal decal looks much more cartoony, which was the intended effect. However, I personally believe, for face and chest decals, that this approach looks best. It seems to fit the character better when done as a vectored image. On the other side, layer effects look good on bricks. They look more technical and sharper. You can obviously choose how to go about this, but this is how I've usually done it, and it works out nicely.
Going back to my anvil outline, I decided to apply a simple highlighting to it using the vector over vector approach. I didn't spend loads of time doing it, either, so remember to do so when making a serious decal.
I decided not to apply the other effect style I use, simply because I use it on much smaller areas with more detail. On something with this much overall area it will look bad.
Other Tips- When making a decal, use layers, and save it in a format that uses layers. This way, you can easily come back and modify it later.
- If you don't think your decal is good, personally, get someone to critique it. If you don't have any reliable critics, then post it in the creativity section and get some opinions on it. From there you can improve it or decide to release it.
- Make something that people can actually use. I admit that early on I didn't do this, but recently I've been trying to think of things people would actually wear and use. Things such as band logos, plain text, and other random images don't work well.
- Don't give up. If you are getting harsh criticism, it should be used to improve yourself. Learn to weed out the useless insults from the valuable criticism.
*Any others to add would be appreciated!
Conclusion Creating a good decal takes time and creativity. The use of vectors should simplify the creation process, as well as smooth and polish the overall look. Use these concepts, whether you're inexperienced or looking for good strategies, and make better decals. I've been using these ideas for a while now, and I've made quite a few successful decals. Four of these decals (Hoodie, Blockland Portable, Remote Control and Monitor 3) are now in BL.
Any additions to this would be appreciated, PM anything you think should be said and I will add it in if I believe it to be useful.
Thanks!