A guide to good Windows customization
AboutI'm finally making a decent topic about Windows visual and interactive customization with the use of many freeware/payware applications, and it should be useful to quite a few people here. Basically, it's a quick guide to getting started on customing and tweaking your Windows desktop to be just as lovely as you expect it to be.
So let's get started, shall we?
Customizing the taskbarThis is the taskbar.

The Windows taskbar has been one of the most common customizable desktop parts known on the Windows operating system. Customizing it is quite easy actually, but you'll have to remember the steps and precautions before diving headfirst into it.
For XP Users1. Download and run UXThemePatcher and begin the setup process. While it is running, Windows may warn you that patching these DLL files may cause Windows to become unstable.
Be sure to hit "Cancel", to stop windows from halting the process. Never have I, or anyone else found their system running unstable because of this. Continue through the installation, and when completed you must restart your computer. When it loads back up you may be confuzed why your taskbar looks as if it was from Windows 98, simply change it back through the Properties menu.
2. Download a Windows XP Theme from one of the following links:
Customize.org XP Themes catagory
DeviantART Visual Styles Customization Catagory (Some of these may be Vista/7 themes, be careful.)3. Install the theme by placing it's contents in a folder that you will remember (For example, Documents/My Windows Themes). Then, once placed, find the theme's main file which is usually with an extension of ".msstyles".

Double click on it, and the Windows Display window will show up with your theme. Simply hit "Apply" and you should be done!

Your Windows XP theme is now up and working. It will stay this way until you run the UXTheme Patcher again to reinstall the default Window's UXTheme.dll file.
For Vista/7 UsersThis is probably the easiest OS to patch for custom themes.
1. Download and install VistaGlazz, which is a small application designed for tuning up windows.
 2. Run VistaGlazz
 and click on the icon that looks like a PC and Monitor (Ignore the other icons, especially the color-strip icon, which will make your Aero theme be 100% glass. You don't want this). It will then ask you if you would like to patch your UXTheme files, click yes and let it install. Then, restart your computer.
When your machine boots up, your computer shoud look the same.
2. download/Install the themeby going to the following links to find Vista and 7 Themes:
DeviantArt: Windows Vista Visual StylesDeviantArt: Windows 7 Visual StylesOnce downloaded, take the theme's main folder (Usually the folder has a few files, EN.us and the MSStyle in it) and place it in
C:/WINDOWS/Resources/Themes.
After that's finished, simply double-click on the theme's name (with the extension .msstyles) and the Windows Appearance window should pop up. Browse for your theme (It may be the actual name of your theme, or it might just be called Windows Aero or Windows Vista/7 Basic), click on it, then press "Apply".
Your theme should now be up and running. It will stay this way until you un-patch your UXTheme.dll with VistaGlazz.
Custom CursorsThis one's a fun one. And easy, too. It's universal for all versions of windows from XP and up, it all works the same.
NOTE: None of this has anything to do with Smiley Central's "Cursormania" bullstuff. That's spam and you know it.
1. Download a cursor set from one of the following links:
Customize.org - Cursors catagory2. Install the cursor set by putting the cursor set in
C:/WINDOWS/Cursors. Then, go to
Control Panel/Mouse and Pointer Options and to go the "Pointers" tab. Then set your Scheme to "None" and go down to the cursors list. Click on the first cursor, and press "Browse". Look for your new cursor set in this window, and try to find the "Normal Select" pointer from it. Click on it and hit Open, and then do the same for the rest of the cursors, matching up the names with your new set.
When finished, simply save your new scheme, and press apply. You should now have a brand new cursor set.
Desktop Interface ApplicationsDeskSpace and Yodm 3D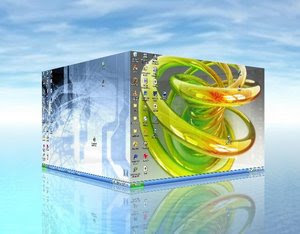
These applications are very useful. They allow your desktop to be duplicated into 6 sides of a cube, where you can have multiple applications running on each side. This is a handy alternative to Extended Desktop with another monitor.
http://www.youtube.com/watch?v=i32DyAV6mqMDeskSpace is a program you can buy for $24.95. But Yodm 3D is the same idea, except free.
http://www.otakusoftware.com/deskspace/ - DeskSpace Website
http://www.klitetools.com/comments.php?catid=58&id=5280 - Yodm 3D download page
360Desktop
360Desktop is an application that turns your desktop into a 360-degree panorama. open windows, rainmeter and desktop icons can all be placed wherever you want on the panorama.
http://www.youtube.com/watch?v=LMRL1bBKYwo&feature=related
http://www.360desktop.com/ - 360Desktop Website
RocketDock
RocketDock is an application that resembles the Macintosh Dock at the bottom of the screen. It can be customized as much as you want, and can be very useful for organisation and applications.
http://www.youtube.com/watch?v=d6UVb15it6Ahttp://rocketdock.com/ - RocketDock Website
Rainmeter
Rainmeter is an application that allows you to have informational widgets on your desktop, placed wherever you want. This includes Date/time, calendars, weather, Computer Status, application launchers and more.
http://www.youtube.com/watch?v=COmH16zKhG4http://rainmeter.net/RainCMS/ - Rainmeter Website
BumpTop BumpTop
 is a desktop modification that turns your desktop into an actual, 3D desktop with physics. Icons can be moved around and thrown across your "desk", as well as hung up on walls and stacked into a pile. This can be incredibly useful if you usually have a messy desktop or if you would like to have photos hung on the walls of your desk. You can also quick-view a photo with BumpTop, the camera will zoom down to your picture and focus properly.
http://www.youtube.com/watch?v=eqcmPJ-oVL0&feature=response_watchhttp://bumptop.com/ - BumpTop Website
Utilities for WindowsOne of the most important things you need when you have a Windows machine is some extra utilities to speed up your computer. Here are a few really useful ones I have found that work incredibly well.
Ninite Download CentreNinite is an easy way to get all the essential stuff you need. It packs all the software you choose on the list into a single installer for your ease.
http://ninite.com/Antivirus SoftwareNinite recommends the best software for virus protection and security. You can download the software you chose all in one go.
Avast! Home Antivirus - I'm using this right now. It keeps everything down pat and I haven't had a virus since 2005 because of it.
AVG Free Antivirus - Never tried it but apparently it works quite well.
Get all of these antiviruses from
http://ninite.com/ (Scroll down to find antivirus selection).
Performance EnhancementThese are a few tools to improve the performance and speed of your computer with a few quick easy steps.
FCleaner - Probably the best tool for cleaning up your stuff that I've ever seen. It's incredibly useful, helps with clearing temporary files and recycle bin stuff. Very, VERY useful. It also comes with a little window in the taskbar that lets you see how your computer is doing at the moment.
http://www.fcleaner.com/download.htmRAMRush - With this tool your computer's speed will never be better. This tool gives you a monitor for your RAM usage and with one easy button press, you can optimize it to free a lot of your memory. I have been using it since January and my games, applications and everything else are just so much faster.
http://www.fcleaner.com/download.htm (This is also made by FCleaner)
More to come soon!
The final productHere is an example of a fully customized Windows Vista 64 Bit computer, in the theme of Hewlett-Packard. I've been working on this style for about a month now.
Click each of these pictures for a fullscreen view.


